Release Date – November 1970
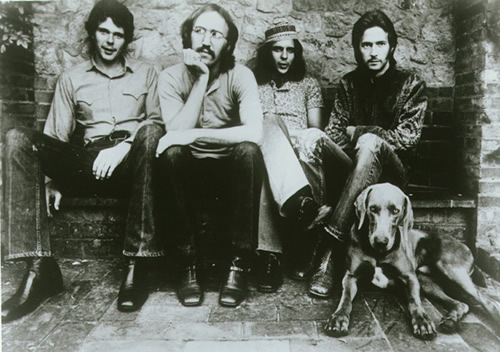
The Band ( full band ) :
Eric Clapton – guitar, vocals
Jim Gordon – percussion, drums
Albhy Galuten – piano
Duane Allman – guitar
Carl Radle – bass
The Bio:
Derek & the Dominos was a group formed by guitarist/singer EricnClapton in the spring of 1970. The group debuted at the Lyceum Ballroom in London on June 14 and undertook a summer tour of England. They recorded the celebrated double album Layla and Other Assorted Love Songs from late August to early October in 1970. They returned to touring in England and the U.S., playing their final date on December 6. This band was chocked full of talent, and that showed on their 1st album.
Verse
The verse to “Bell Bottom Blues” has 3 different guitar parts. 1 rhythm part and 2 lead guitars (that play in only the last measure). In this lesson, you’ll learn how to play all 3 parts. Here’s what they sound like all together:
Rhythm Guitar
Much of this riff is built around arpeggiated chords. Knowing the chords that are behind it is the key to learning how to play it properly.
The basic chord progression is C,E,A,C/G,F,G,F,G7. Sometimes when looking at a piece of music you’ll see some odd chord voicing that have slashes in them. For example a C/G chord, or an A/E. They are a chord voicing with the root note altered. In our examples above the C/G chord would be a C chord with the bottom note being a G. It’s just like adding a note to the existing chord voicing to create harmonic tension or to create a moving bass line in a series of chords.
The simple way to get the correct fingerings is to just follow allong
with the chords at the top of the staff. Begin the first measure by performing a hammer-on. A hammer-on is when you go from a lower note to a higher note, only striking the first note(s). Start on the “D” string, and play that open once, and then use your 2nd finger on the “D” string to hammer-on to that note. Place your 1st finger on the “B” string on the first fret. You would obviously need to keep your 2nd finger on the second fret on the “D” string, and your 3rd finger on the second fret on the “A” string. Now, follow the pattern that is showing on the tablature UNTIL you get to the “G” string on the second time you WOULD play it. When you get there, move your 1st finger to the “G” string instead of the “B” string, and play that. Follow the notation progression to end the measure. For the second measure, barre your 1st finger on the “D” and “G” strings on the second fret. Allow the “A” string to remain open and play accordingly. Next, place your 1st finger on the second fret on the “D” string. Place your 3rd finger and 2nd finger on the the third frets of the “low E” and the “A” string. Play according to the tablature to end this measure, The third measure looks harder than it really is. Begin this measure by placing your 1st finger on the first fret on the “low E” string, Then, place your 3rd and 4th fingers on the third frets of the “A” string and the “D” string. Play that once in the order shown, and then move your 3rd and 4th fingers to the fifth fret by sliding there. Then, use your 1st finger on the fourth fret on the “G” string. Last, use your 2nd finger on the fifth fret on the “D” string and slide it to the third fret to end the measure. The last measure is easy. Barre your 1st finger over all strings on the first fret. Use your 2nd finger on the the second fret on the “B” string, and your 3rd and 4th fingers on the third fret on the “A” string and “D” string. Play that twice. To finish the measure, barre your 1st finger on the the third fret on all strings, but do not play the “A” string. Use your 2nd finger on the fourth fret on the “G” string.
Here’s a variation of the the basic rhythm part:
Lead Guitar 1
Both lead guitar parts rest during the first 3 measures and play only
in the 4th measure (using the rhythm part as a guide).
Begin this riff by barring your 4th finger on the “high E” string
on the thirteenth fret and also on the “B” string on the
thirteenth fret. Play in order shown on the tablature, and then use
your 2nd finger on the “B” string on the eleventh fret. Next,
you will be performing a full bend. You will need to bend it by using
your 3rd finger on the twelfth fret on the “G” string. Next,
use your 1st finger on the “high E” string on the tenth fret.
To finish the measure, use your 2nd finger on the 12th fret on the “B” string. Perform a little vibrato by shaking the string rapidly. You can see the fingerings above the tab in the the picture below:
Lead Guitar 2
Begin this part of the lead guitar by barring your 4th finger on the
thirteenth fret on the “high E” and the “B” string. Play that about twice, and then with your 1st finger play the eleventh frets barred on the “high E” and “B” strings as well.
Bend the 12th fret with your 2nd finger. Next, use your 3rd finger
on the “B” string on the thirteenth fret. Play that once,
and then use your 2nd finger on the “G” string on the twelfth
fret to pre-bend up one full step (bend it up before you strike the
note) then release the bend. Add a bit of vibrato to end the measure.
You can see the fingerings above the tab in the the picture below: