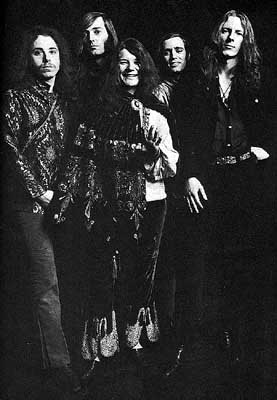
This gem was one of the greatest female rock singers of the 1960s. Janis Joplin was also a great blues singer, making her material her own with her wailing, raspy, super chunky emotional delivery. First rising to stardom as the frontwoman for the San Francisco psychedelic band, Big Brother and the Holding Company, she left the group in the late ’60s for a brief and uneven (though commercially successful) career as a solo artist.
Verse
Here you will be focusing on using your thumb a little more than usual. Some people have trouble with this, but it is mainly due to the way that some people’s muscles feel when they stretch over the neck as required. It may be a little uncomfortable, but by working on it with this riff, you are still able to barre certain notes if you are having trouble using the thumb. Even if your hands are smaller than usual, you should still try to learn a little about how to do this. One big key in using the thumb is NOT focusing on how your fingers usually sit on the strings. You may have to angle them a little differently, and you may have to turn your elbow a bit more in or out, but either way, you CAN still do it. A major advantage of using the thumb is the understanding that ultimately, as simple as this may sound, it’s true – you simply have more use of other fingers. Stevie Ray Vaughan, Jimi Hendrix, and Jimmy Page were very big on using their thumbs. Many blues guitarists and jazz musicians also do this.
Give it a try – you just may never play a barre chord the same!
There will be a “trill” in this lesson. You may or may not have worked much with trills, but what you do is pretty simple. All you have to do is take the first note and the second note and alternate them rapidly on the frets. For example, when you are on the fifth fret, and you see a smaller fret number ( in parentheses – for example – 5 (6) ) beside the fifth fret on the tablature, you will go as fast as you can from the fifth fret to the sixth fret over and over. It actually feels much like a hammer-on and is also treated much the same, as far as only striking the first note(s) being played.
You also know that there will be a trill because of the ribbon-like strand that is on top of the tablature. You also know because in front of the ribbon-like strand, there are abbreviations “tr”. Parentheses ALSO note that this is a trill.
Guitar 1

Begin the first measure of this riff by placing your 2nd finger on the second fret on the “D” string. Place your 1st finger on the first fret of the “G” string. Play the “low E” open once, and then play the second fret. Now, here is the trill. Notice that it shows the open fret in parentheses. That just means that right after you strike the first fret, lift on and off repeatedly for one beat, and then play the “B” string open once. Next, you will need to use your thumb. Wrap your thumb over the neck of the guitar so that it looks like the tip of your thumb is closest to you. Put it on the fifth fret on the “low E” string. Now, place your 3rd finger on the seventh fret on the “D” string. Place your 2nd finger on the sixth fret on the “G” string. Last, go ahead and barre your 1st finger on the fifth frets of the “G” string and the “B” string. That will allow you to perform a trill much easier. Now all you have to do is play accordingly, and when you get to the trill, just lift your 2nd finger up and down on the sixth fret, as long as you kept your 1st finger barred on the fifth fret on the “B” string and the “G” string. If you don’t feel good about this, just omit the thumb, and barre all of the fifth frets on the appropriate strings to be played.
For the second measure, all you are doing is using your thumb again as root. Place your thumb on the seventh fret on the “low E” string. Barre your 1st finger over the “high E” string and the “B” string on the seventh fret. Place your 2nd finger on the eighth fret on the “G” string, and your 3rd finger on the ninth fret on the “D” string. Play the “low E” seventh fret, and then strum the other chords twice. Do the same thing again, but this time, move up to the fifth fret and adjust accordingly.
Guitar 2

For the second guitar part, the second measure is identical to the second measure in the first guitar part. Let’s focus on the first measure of this part.
For the first measure of this part, place your 1st finger on the fourth fret on the “high E” string. Place your 2nd finger on the fifth fret on the “B” string. Play that according to the tablature twice, and then just move your 1st finger to the fifth fret on the “high E” string to end the measure.
